TWI

Friday, April 1, 2011
Everything Cherries : New FTU Tut
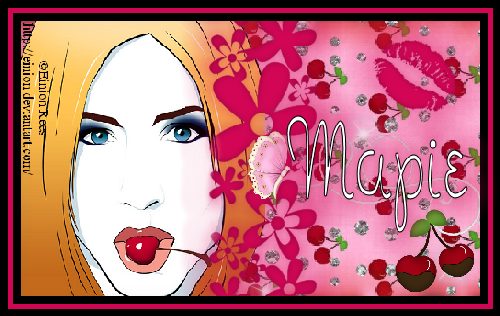
Everything Cherries Mini Tag (FTU)
A working knowledge of Paint Shop Pro is necessary.
I'm using PSP 9, any version would work.
Materials needed:
Pop My Cherry kit from Pink Princess Scraps – You can find it here:
http://pinkprincessscraps.blogspot.com/2009/09/ptu-now-freebie-pop-my-cherry.html
Tube of choice. I'm using the vector art work of Einon Rees. - You could use any tube you like, if so desired.
Xenofex2 Burnt Edges
Eye Candy 4000- Gradient Glow
Font of choice. I'm using Noodle Doodle.
Let's get started:
Open a 500x300 transparent canvas.
Open paper 6, and Shift D, to duplicate it. In the Materials palette, activate the patterns, and select paper 6. Change the angle to 90, and the scale to 75. Flood fill canvas.
Use Xenofex 2 Burnt Edges, change the burn color to red. Apply. Resize canvas by 120%. Apply Eye Candy 4000 Gradient Glow, Faint White setting, change the pixel setting to 34.63, Soft Corners to 7%, and the opacity to 34. Apply.
Open your tube of choice, and resize by 80%. Copy and paste as a new layer, move it to the left side of the canvas. I erased part of the lower right hand corner to eliminate that bit of purple there. Add a drop shadow.
Open Element 25, Go Image, Rotate, Free Rotate, rotate by 90 degrees to the right. Apply the Gradient Glow, and a small drop shadow. Position the element as shown.
Open Element 21, Shift D to duplicate, close the original. Resize to 30%. Apply the Gradient Glow, Go Image Rotate, free rotate, rotate by 30% to the right, and position as desired.
Open Element 71, copy and paste as a new layer, moving it to the right side of the canvas.
Open Element 6, Shift D, to duplicate. Close the original. Resize the copy by 30 percent, position as shown.
Open the chocolate covered cherry element, Shift D to duplicate, close the original, resize the copy by 30%. Position as shown.
Open element 57 (the string doodle.) Shift D, close the original, resize the copy by 70% twice, position as shown, and arrange the layer in the layer palette as shown.
Merge Visible.
Go to Image, Add Borders. With Symmetric checked, add a black border that is 8 pixels wide, using the magic wand, click on the border, and add a drop shadow. Select None.
Go Image, Add Borders, this time make the border red, and 6 pixels wide.
Again, go Image, Add Borders,do another black border, 8 pixels wide. Use the magic wand, click on the second black border, add a drop shadow, select none.
Add copyright information/artist credit and Personalization. I used Noodle Doodle font, size 36, black as the foreground, white as the background. Apply Gradient Glow and a drop shadow.
Merge Visible. Resize by 92%, all layers checked. Save as a .png.
Subscribe to:
Post Comments (Atom)
0 comments:
Post a Comment